


iStairs wants to help those who share the passion of making stairs and DIY projects. In this article, we will teach you how to upgrade your current stairs to a more beautiful staircase by installing new treads and railings.
Step 1: Prepare the tools and materials you need.
For stair treads and railings installation, you will need the following:
Tools: Tape measure, drill, hand stapler, drill, drill bits, tapping block, rubber mallet and pneumatic finish nailer.
Materials: Stair treads, handrail, risers, balusters, wood flooring, support brace, lag bolts, wood putty, screws and finish nails.
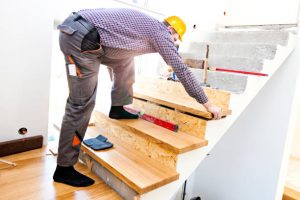
Step 2: Cut your stair treads and install them.
Depending on your stair case design, your treads will be of slightly different sizes. Measure each thread to fit its place perfectly. Cut as measured.
After you cut your tread, it’s time to install them. In installing treads, always start from the bottom and start your way up from there. Screw them tightly and securely. You should consider adding a brace between the stringers on the top step for added support.
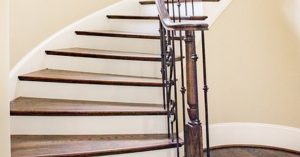
Step 3: Install your newel posts
For half newel posts, have your posts pre-drilled and also make sure to prepare holes on your walls for toggle bolts. Then insert screws for toggle bolts and then attach the toggles on the other side. Insert toggles to the wall and then tighten the screws.
For newel posts, position the post securely with lag bolts.
Step 4: Cut the rail
With your treads and newels installed, it’s time to measure the railing. Mark it for an angled cut, and then cut it. For an accurate cut, mark the rail as you rest it along the stairs.
Step 5: Install your balusters
After having your rail cut, you don’t immediately install it. You need to install the balusters first. Have your treads pre-drilled for the balusters. Use a stair bit that creates a thread to accept the baluster bolts. As for the balusters, drill on the center and insert baluster bolts there. Securely screw your balusters to your treads.
Steps 6: Attach your railing
With your balusters and newels in place, it’s time to attach the railing. Attach rail fasteners to the newel posts. Guide your railing to the rail fasteners and insert the balusters to the holes on the railing.
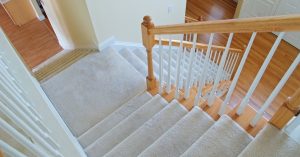
Step 7: Tidy up your project
Now that you have installed your new stair treads and railings, tidy it up for a clean look. Make sure to fill screw holes with matching wood putty. You may also consider installing new base moldings for a better look.
Seek professional help as needed
iStairs love people who take stairs seriously. True enough, stairs can be a work of art and it can make you proud to have built your own stairs – your own masterpiece.
But always make sure that you seek professional help when you need it. You will need a well-built staircase and you should consider asking for help when you’re not sure how to do a specific step.
And who is the best to ask for help? iStairs of course! So just give us a call and we will give the help you need!