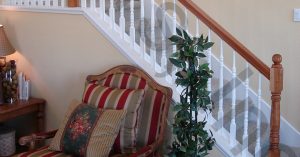


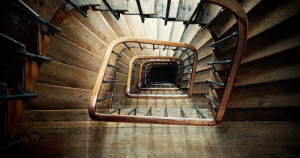
A staircase is an important part of your home. It is one of the first things you see as you walk into the house, so making sure it’s always in good shape is a nice way to greet yourself and other visitors who will be welcomed in your home. However, like all parts of the house, sometimes the staircase can start showing damages due to age or wear and tear.
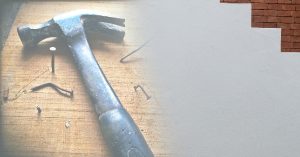
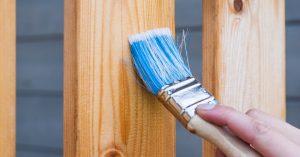
Renovating an older staircase yourself can be challenging, but definitely doable. You won’t need to spend much to fix it, you just need a few DIY skills, a lot of patience, and a lot of effort. Most staircases can look brand new just by adding a new skirt board and reworking the antique handrail. If you think your old staircase is due for a retouch, here are some easy steps for a simple yet effective renovation project:
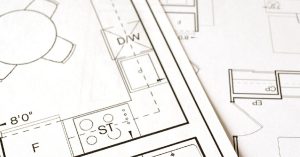
1. Draw up a Plan
A successful project requires careful planning, and this DIY task is no exception. You need to make a detailed plan first before busting out your tools to ensure that you don’t forget any important parts and that you will be able to do everything you want to.
A worn-out staircase can still be rehabilitated given that the framing still holds strong. The first step of planning is determining if you will be repairing or completely replacing certain components of the staircase. The usual suspects of wear and tear in a staircase are the handrail and its balusters, treads, risers, or the skirt board.
If you opt to purchase replacement parts, make sure you can properly identify each part so that you won’t make a mistake at the shop. Also, consider if you want to get the same models as replacements or if you want modifications. For instance, you can choose to upgrade to winder steps if you feel that you need to save on space inside the house. Winder stairs are also more pleasing to look at, so consider the aesthetics as well.
Planning your new staircase also involves getting the exact measurements for repairs or replacements. Measure the length of the handrail and base rail, count how many spindles you need, and review any other details you need to take note of before making any changes.
2. Working on the Skirt Board
Once you’re done setting up a plan, it’s time to dive into action. Begin by fitting and cutting the skirt board. It should be long enough to reach from top to bottom of the staircase and wide enough to cover the height of the riser and width of the tread. You can use quality boards like an A-grade clear lumber stock to give your new staircase a more sophisticated look. After all, some say that the staircase is a showpiece fixture, so it wouldn’t hurt to make an effort to improve how it looks.
Once you have the skirt board ready, position it against the edge of the staircase. Hold it in place temporarily so you can make marks vertically on where each of the risers meets the board. Do the same for each of the tread tops by marking horizontally on the points where they meet the skirt board.
Remove the skirt board from the edge of the staircase so you can start readjusting the marks. Move the horizontal marks for each tread down by one inch so that the skirt will fit right under the treads after installing it. Then, cut the riser and tread lines at a 90-degree angle with a circular saw. You can start cutting with a power saw because you’ll need its force to penetrate, then switch to a hand saw or jigsaw as you finish cutting for better control of the details.
3. Installing the Skirt Board
Before installing the board, go for a test fit first. Lay the board against the side of the staircase to check if it fits well. The board should fit right below the treads, while the riser cuts smoothly go into the original risers. The risers should line up to make sure all gaps are covered well.
Once you’ve verified that it fits, start using wood glue and finishing nails to fasten the board to the staircase. Next, fasten the treads in place by applying construction adhesive to the stair stringers and then setting the treads in their fitted marks. A nail gun would be ideal in fastening the treads, but make sure to pre-drill holes for the nails if the treads are made of hardwood.
4. Adding the New Handrail, Balusters, and Newel Post
You’re almost done! Once the treads are fastened, it’s time to attach the lower end of the new handrail to the post. Lock balusters into their rightful places (you should see notched grooves marking these), and set all the spindles into the appropriate treads and into the handrail. Finally, secure the top end of the handrail to the upper newel post.
The structural elements of your new staircase are now in place. It’s up to you if you want to add finishing touches in the form of paint, lighting, or other decorations. Let your creativity shine and look for new artistic ways to let your new staircase stand out.

A Final Word on DIY Renovations
DIY renovations are not for everyone. Some people don’t have the time nor the skills to successfully complete a renovation project, and that’s okay.
For all your renovation and repair needs, iStairs Inc. can assist you by providing quality service at the most competitive prices. Give our team a call today and ask about our staircase renovation and repair services.
Source: Renovate Me