Renovations

Renovating your staircase is a perfect way to spruce up your entryway; and while most people get a general idea on what they want to happen, it’s often best to read more and reassess your plans before starting your project. Our blog on renovations can give you a better idea on designs, costs, and safety of your stairs.

How to Build Stairs

January 19, 2016

Choosing the Right Carpet for your Stairs

The process of choosing the right type of carpet for the stairs of your home is one to take seriously because poorly installed carpet, or carpet that is of poor quality, can really impact the safety of your stairs and the beauty of your home.

While many homeowners may at first think that carpet selection is the only important thing to consider when choosing carpeting for the stairs in their home, it is also just as vital to select the right carpet installer with a strong reputation for providing quality carpet installations and excellent customer service.

So in an effort to get you on the right track towards choosing the best carpet for your stairs as well as selecting the right company to do the job, here are some tips and things to remember along the way!

  1. Fiber quality matters: No matter what type of fiber your carpet is made of, the general rule of thumb is that the more tightly woven that the fabric is, the better the carpet will be able to withstand abrasion. Long individual fibers for example, cause less shedding and are more likely to remain in the carpet. Remember also that you can discern much about the quality of a carpet based on how it feels; a quality yarn feels soft, while yarn of poor quality feels coarse and dry.
  2. The properties of wool make it a natural choice for carpet: Wool is an exceptionally durable and naturally beautiful fiber, and since wool has a natural tendency to resort to its original shape after being pressed on, this fiber makes for the ideal carpet material. Moreover, wool is easy to clean as the way its fibers are arranged makes it possible for dirt and dust to be easily removed.
  3. Choose carpet color wisely: While the colors ivory and pale beige are typically the most popular choler choices for homeowners, such colors are most practical in areas with light traffic, whereas stairs and entryways are best suited for taupe or mushroom color.
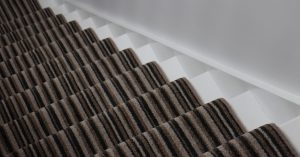
  4. Carpet texture: Carpet texture is one of those details that you wouldn’t normally think about prior to selecting a carpeting material but it actually does make a difference when it comes to choosing carpets for areas of high traffic in your home. Since the stairs are a high traffic area, it would be wise to consider a texture that is capable of hiding stains and footprints, such as a combination of loops and cut pile.
  5. Carpeting on stairs is important for safety: A problem with the carpeting on your stairs could potentially be very dangerous when walking on the stairs, and that is why it is crucial to have a quality installation performed by experienced professionals. Therefore, if you really want the job done right you must take the time to find a quality carpet company and installer with a proven record of customer satisfaction, instead of a company who just subcontracts the labor. Remember, it’s not just the quality of the carpet, but the quality of the installation that matters when it comes to choosing the best carpeting for your stairs.


How to Build Stairs

When it comes to designing and constructing a quality staircase, the old carpenter’s adage of ‘always measure twice and cut once’, is something you will need to remember and practice throughout the entire process on how to build stairs.

Since functionality is the most important element of a staircase for basic safety reasons, it is imperative to make precise and accurate measurements and cuts when designing and constructing your stair design. But prior to actually starting the process of stair design, be sure to consult both local and national building code requirements to be certain that your staircase will be safe and up to all standards. Remember: the art of the carpenter-built stair is not one easily mastered, so it will take more than the basic information presented here to understand the more nuanced details of measuring and cutting.

A Guide on How to Build Stairs

There are several measurements you will need to calculate and verify in order to complete your stair design, here are some of the fundamental measurements you will need:

  • The size of your stairwell, leaving sufficient headroom so as to have enough space for your head when walking up and down the stairs (believe it or not, it is actually not uncommon for carpenters to forget this calculation only to realize at the end of construction that the stairwell is too short!).
  • The number of risers (the vertical space between the treads) and the number of treads (the horizontal walking surface).
  • The length of the stairwell-the width of the upper floors vertical shaft in which the stairs are located).

Once all of the calculations and measurements have been checked and rechecked, it is time to start assembling your stair design. Here are the main constructing steps, summarized but not limited to the following 11 steps:

  1. Lay out the stringers, which are the support of the treads and risers, by setting the rise and run of the stair on the framing square.
  2. Mark off the number of treads and risers, being sure to start with the first riser and end with the top riser, followed drawing in the second floor line.
  3. Repeat for all 3 of the risers.
  4. Double check the stair design by making any necessary final adjustments to the stringers, after taking into account any changes to the top and bottom risers.
  5. Once the stringers are correctly laid out, it’s time to cut the triangle portions off of the framing square. Check the accuracy of the stringers by placing them together to see if they align; if they do not, you must make adjustments.
  6. Position the right and left stringers on top of the 1-by-12 inch skirt boards, which are nailed together, so then the stringers, can be nailed directly on top of the dry wall (if no dry wall, you must fill out the stringers to the thickness of the wall and nail or screw in place).
  7. Mount the center stringer to the top of the header and the blocking at the floor.
  8. After the stringers are in place double check all the tread cuts for level and plumb, in every direction, and also to make sure that the top and bottom risers allow for the finished tread height.
  9. Next, rip and nail the risers into place and then glue them as well.
  10. After cutting the treads to the correct length, glue and nail them into place.
  11. Finally, you will likely need to mount a handrail, be sure to mount it all 34 inches above the leading edge of the tread, and that it contains a wall rail bracket screwed into a stud or backing every 4 feet.

Building stairs can be a difficult and confusing task. That is why iStairs is ready to help you get the stair design you want. Call us today to find out how we can take care of everything for you!

How to Fix Stair Scratches

The beauty of hardwood stairs does not have to fade with the accumulation of scratches due to the natural wear and tear of foot traffic, so long as you know the proper way to fix and repair stairs with scratches.

[Read more…]